Open the lab
[ YOUR LAB FILE ]
Download the starting topology, then work through the lesson in SwitchLab.
- Save the .swlab file without renaming its extension.
- Open SwitchLab. Import and export controls currently require a desktop-width window. On a smaller screen, Tools → Fit brings the topology into view.
- Select Import Sandbox (folder icon), choose the downloaded file, and confirm the device and cable counts below.
- Select a device, then choose Open device on desktop or its name in the bottom bar on smaller screens. Select CLI for switches/routers or Desktop → Terminal for PCs. Enter
enableonly when the prompt ends in >. - Follow this page beside the simulator. Use a free account to export your work. Reimport the original download to restart; export any work you want to keep first.
Prerequisites
- Open a SwitchLab device CLI and use enable to enter privileged EXEC mode.
- Read the addressing and physical cabling tables before changing configuration.
Topology
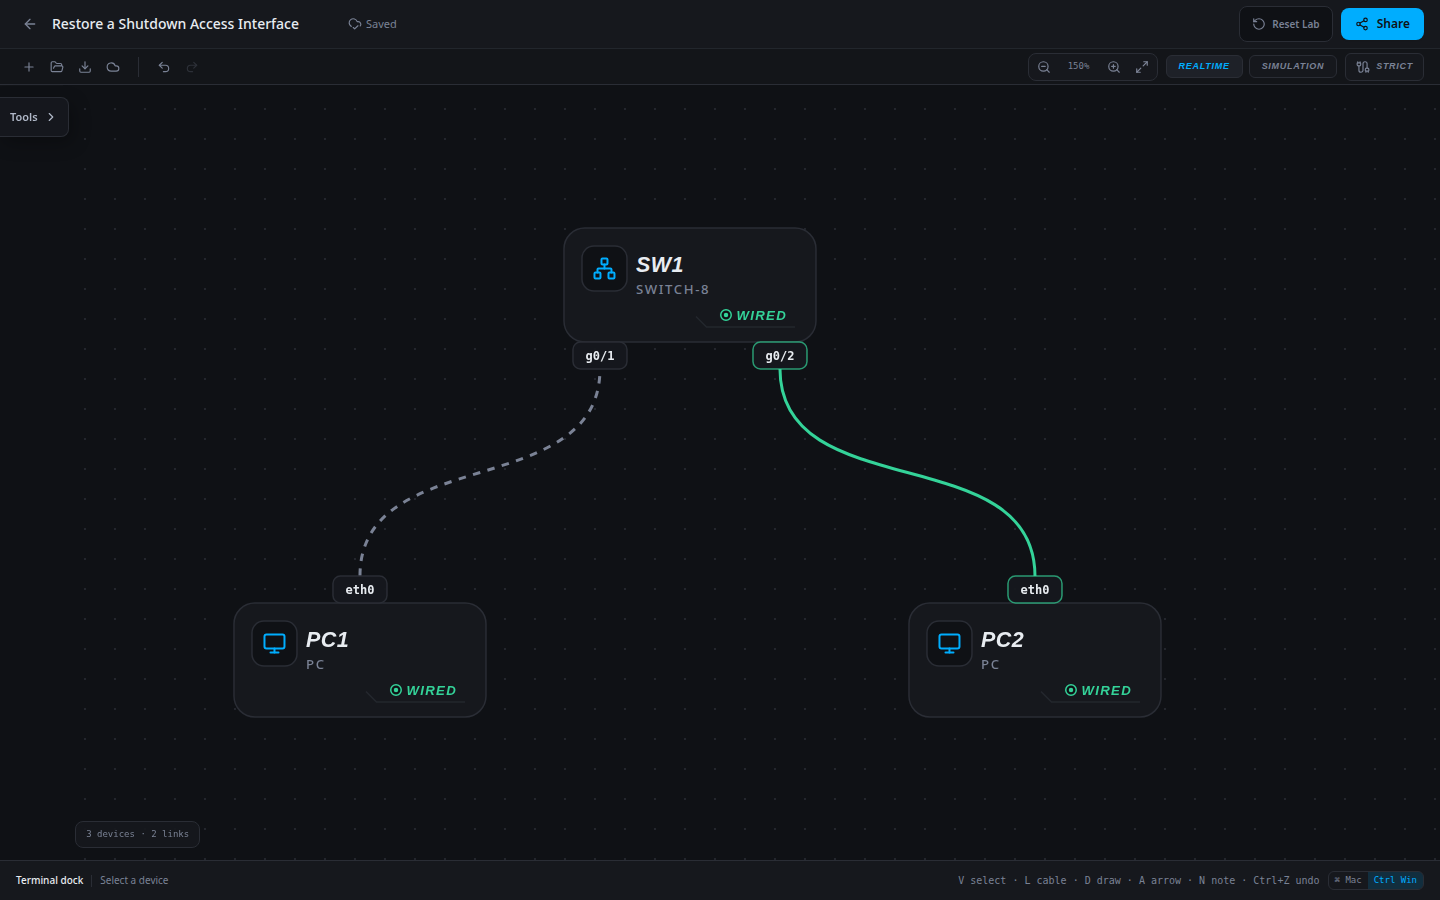
3 devices · 2 links
Scenario
PC1 cannot reach PC2 after a maintenance window. Both host addresses were checked against the approved plan; identify why one switch access link is unavailable.
Objectives
- Map each physical host cable to its switch port.
- Relate administrative state and dynamic MAC learning to observed delivery.
CCNA blueprint
200-301 v1.1 objectives — this lab covers the following specific skills, not every subtopic in the domain.
- 1.4 — Observe interface administrative state; physical duplex and collision measurements are outside this lab.
- 1.13.a — Observe source MAC learning on a switch.
Starting information
- Both PCs use 192.168.1.0/24 in VLAN 1. No router or default gateway is needed.
- PC1 connects to SW1 g0/1; PC2 connects to g0/2. Preserve this cabling.
- This lab observes link state and MAC learning; it does not measure collisions, duplex faults or physical cable quality.
| Host | IPv4 address | Mask | Gateway |
|---|---|---|---|
| PC1 | 192.168.1.10 | 255.255.255.0 | None |
| PC2 | 192.168.1.20 | 255.255.255.0 | None |
| Device / port | Device / port |
|---|---|
| PC1 / eth0 | SW1 / g0/1 |
| PC2 / eth0 | SW1 / g0/2 |
Tasks
- Use PC1 and PC2 to test the path. Compare
show interfaces statuswithshow running-config interface g0/1on SW1 before making a change. - Determine whether the port is administratively disabled. Do not change the correct IPv4 addresses, VLAN 1 assignment or PC2 port.
- Restore the affected access port, then repeat both host pings.
- Record the failed state, the single repair and the successful verification; save and export the result.
Useful commands
show interfaces status
show running-config interface g0/1
copy running-config startup-config
Progressive hints
Hint 1
Begin with the cable map and interface status; do not infer the cause from a failed ping alone.
Hint 2
A configured shutdown keeps an interface unavailable even when a cable is present. A working switch learns source MAC addresses as hosts transmit.
Hint 3
Use interface g0/1 on SW1; apply no shutdown, then test from each PC.
Verification
- PC1 and PC2 can ping each other in both directions.
- SW1 g0/1 is enabled and remains an access port in VLAN 1.
- After both PCs transmit, the dynamic MAC table identifies host entries on g0/1 and g0/2.
Solution / walkthrough
Show Solution
Use enable only from a > prompt; if already at #, begin with configure terminal.
SW1
Preserve the existing flat LAN while documenting or enabling the intended host-facing port. Generate host traffic before interpreting the MAC table.
enable
configure terminal
interface g0/1
no shutdown
end
copy running-config startup-config
Run every verification check above after the changes. A saved configuration alone does not prove packet delivery.